In our previous blog post, we walked through High Volume Email (HVE) in Microsoft 365, a solid option for internal bulk email needs. Now, it’s time to explore a broader alternative—Azure Communication Services (ACS)—to keep your email game strong! If you're still using SMTP AUTH and feeling the pinch from Microsoft’s plan to retire Basic Authentication, don’t worry. ACS is like a trusty sidekick, offering a secure, modern way to send emails via SMTP relay, plus some cool extras like voice, video, and chat. Whether you're sending order confirmations or app notifications, ACS has you covered. Let’s check out why ACS is the friendly hero your email setup needs!
Why Azure Communication Services Rocks
ACS is your all-in-one hub for keeping your apps connected and chatty. Here’s what it brings to the table:
- Email Without the Fuss: Send emails with a secure SMTP relay using modern OAuth authentication—no more Basic Auth headaches. It’s like giving your emails a VIP pass!
- More Than Just Email: ACS lets you add voice calls, video chats, or instant messaging, perfect for customer service or virtual team catch-ups.
- Scales Like a Dream: From a few emails to a million notifications, ACS handles it all smoothly, no sweat.
- Developer-Friendly Goodness: With easy-to-use SDKs and APIs, you can plug ACS into your apps faster than you can say “email upgrade.”
With Exchange Online’s Basic Auth retirement coming in September 2025, ACS is the perfect way to modernize your email workflows while keeping things secure and efficient. It’s as simple as switching to your favorite coffee order—smooth and satisfying!
Prerequisites
Before you begin, ensure you have the following in place:
- Ability to Assign Roles (IAM): Access to manage Identity and Access Management (IAM) to assign roles for ACS and AECS configuration.
- Contributor Role: Grants permissions to create and manage ACS, AECS, and resource groups at the subscription or resource group level.
- User Access Administrator Role: Allows you to assign roles to users or applications for managing ACS resources.
- Cloud Application Administrator Role: Enables setup and management of Microsoft Entra ID application registrations for OAuth authentication.
- Communication Services Email Admin / Contributer: Required to configuring and verify a custom domain
- Microsoft Entra ID Application with a Secret: A registered application in Entra ID with a client secret for OAuth-based authentication.
- Custom Domain: A registered domain you control, with access to configure DNS settings for email verification.
- OR!
- Global Administrator / Owner: If thats what you prefer 😉
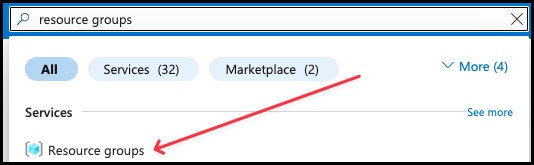
Step 1: Create a Resource Group
A resource group organizes your Azure resources. If you don’t have one, let’s create it:
- Sign in to the portal.azure.com.
- Navigate to Resource Groups > Create.
- Enter a Resource group name.
- in this example I used the name:
rg-emailaa-westeruope-01
- in this example I used the name:
- Select your preferred Region and click Review + Create, then Create.
- Note: Ensure you have the Contributor role at the subscription level or for the new resource group.
Step 2: Configure Azure Email Communication Services (AECS)
Let's create our Email Communication Service.
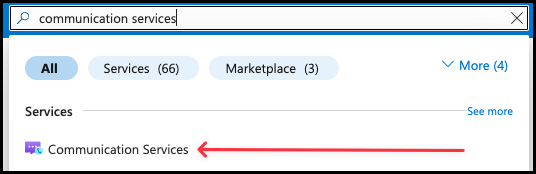
- Search for Email Communication Service in the search bar.
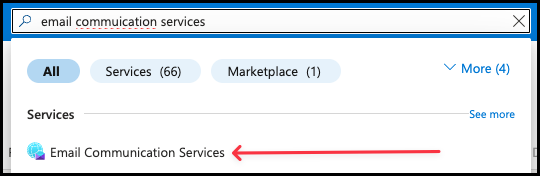
- Click Create
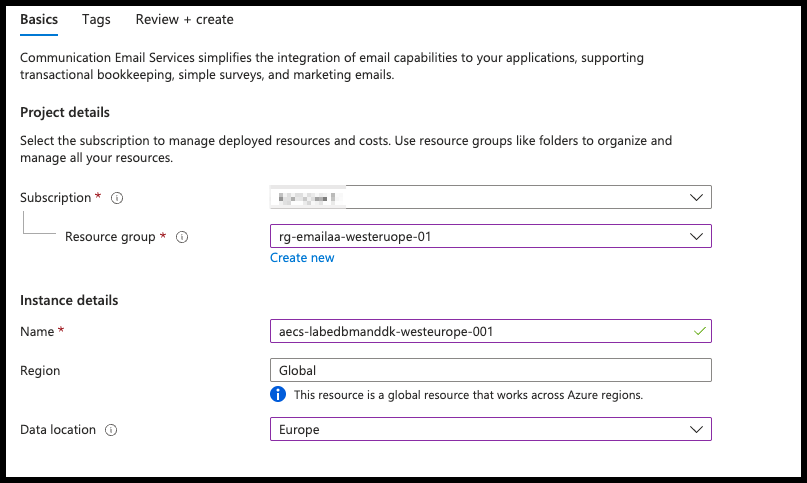
- Select your Subscription and Resource Group. Give the AECS a name
- In this guide I use:
aecs-labedbmanddk-westeurope-001
- In this guide I use:
- Pick a Data location
- In my case Europe
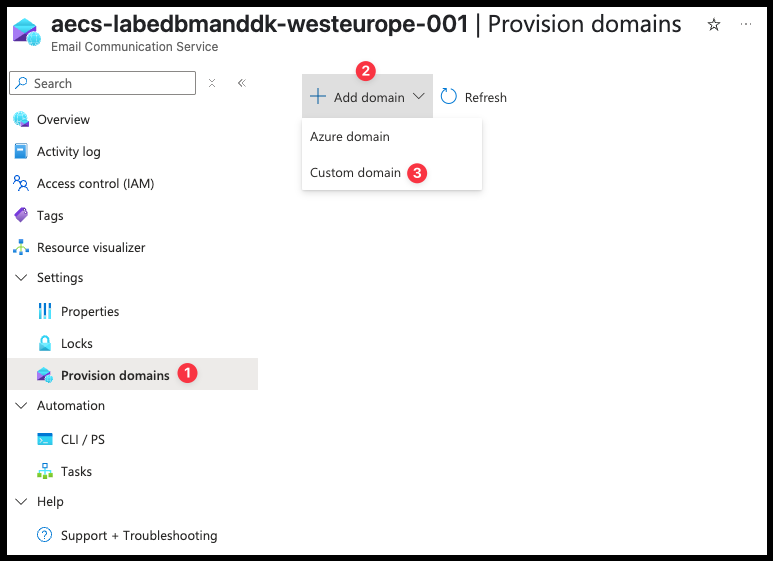
- When created, open the Email Communication Service and click on Settings -> Provision domains
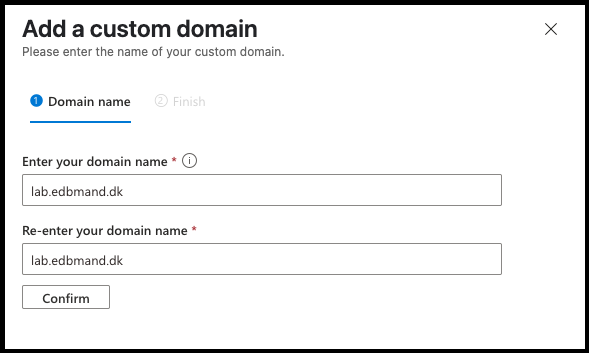
- click on Add domain -> Custom domain
- Enter your custom domain name
- You need access to the public DNS for this domain
- Click Confirm -> Add.
- This process can take a few minutes.
- Click on Verify Domain when it's done processing
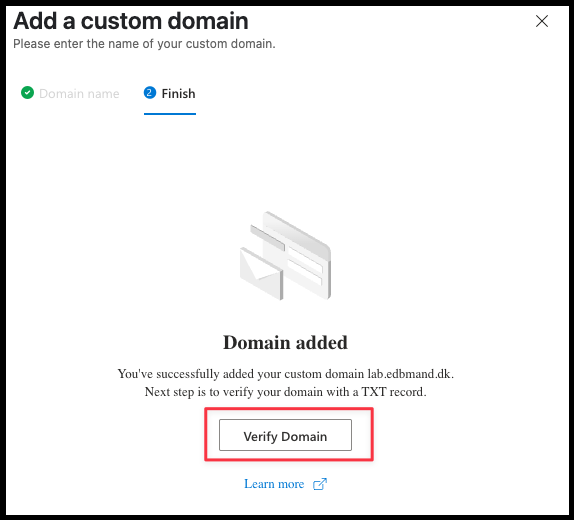
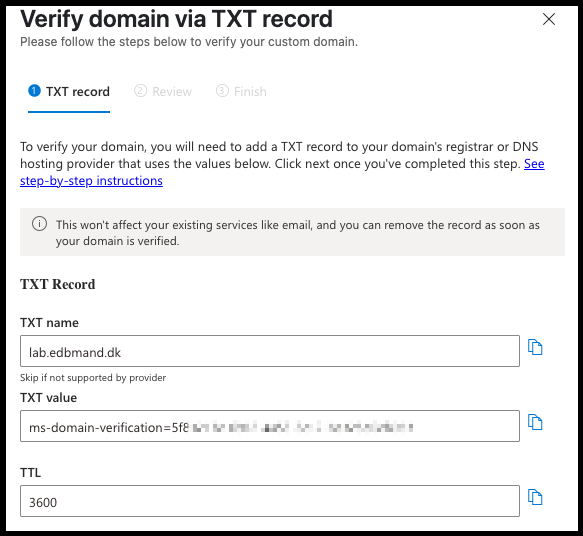
- Create a TXT record with the provided value to your Public DNS. Once completed, click Next to continue.
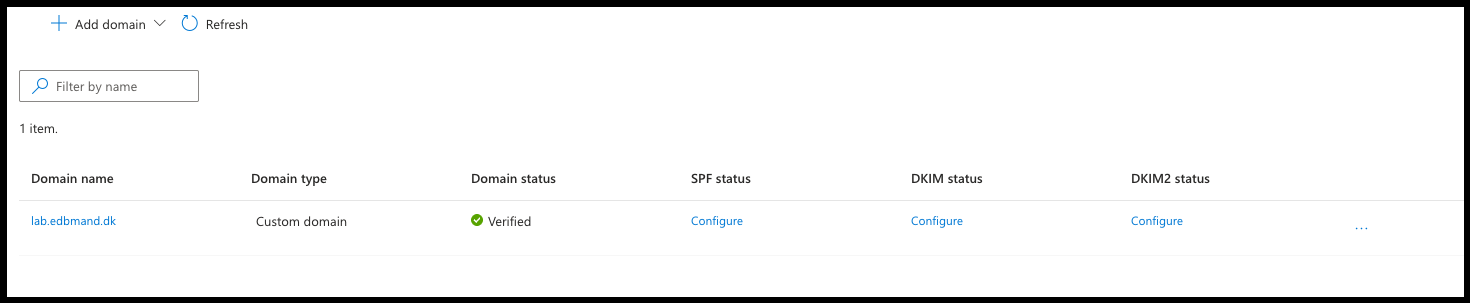
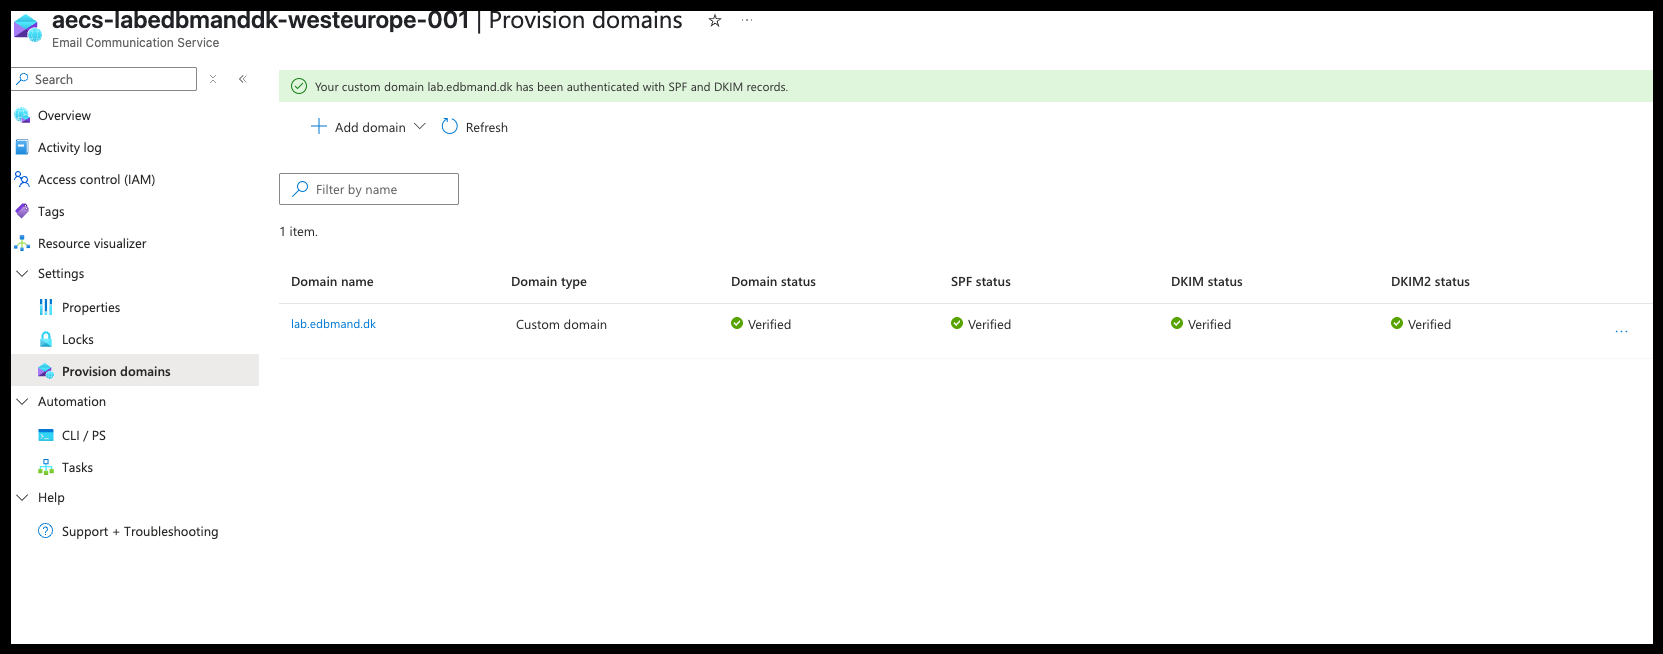
- When verified you will see the domain in the overview
- To use the domain in the Communication Service that will be created later, you need to configure SPF, DKIM, and DKIM2.
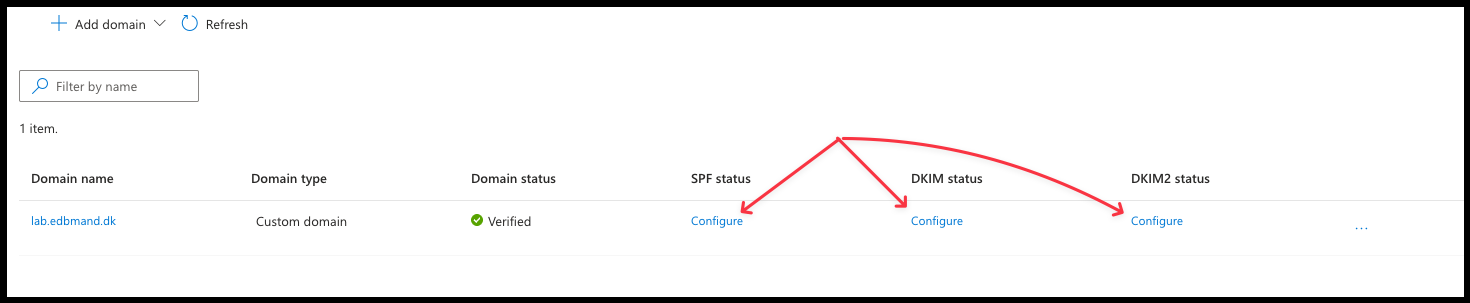
- Add the provided records to your public DNS and wait for verification. Once verified, the result should look similar to this:
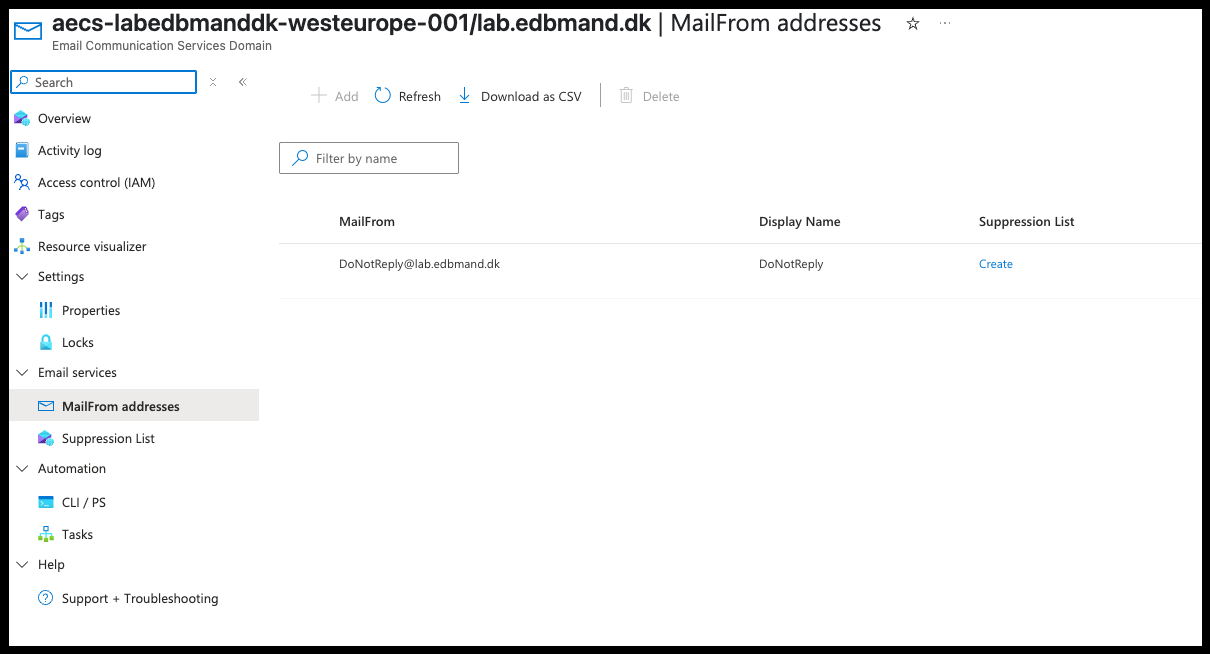
- Click your custom domain, then navigate to Email services and select MailFrom addresses.
- A generic mail "DoNotReply" has been created, this email will be used as sender address later on.
Step 3: Set Up Azure Communication Services (ACS)
- Search for Communication Services in the search bar
- Click Create, Select your Subscription and Resource Group. Give the Communication Service a name and click Review + Create, then Create.
- In this example I use:
acs-labedbmanddk-europe-001 - Choose your Data Location
- In this example I use:
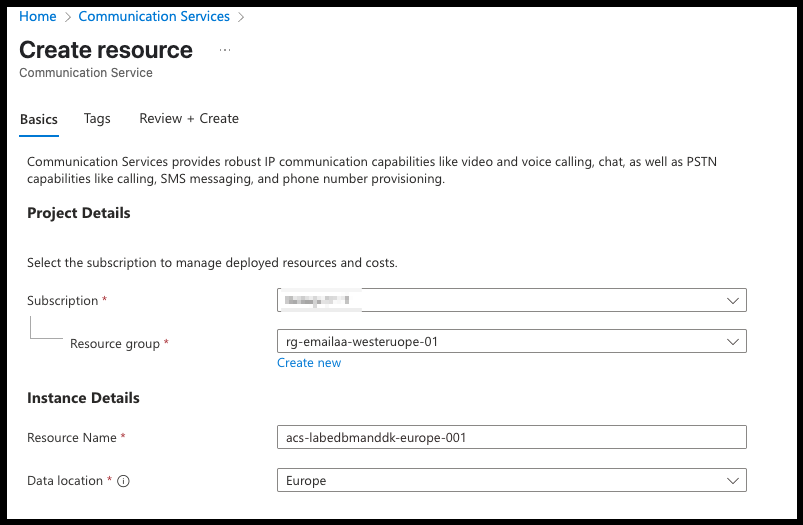
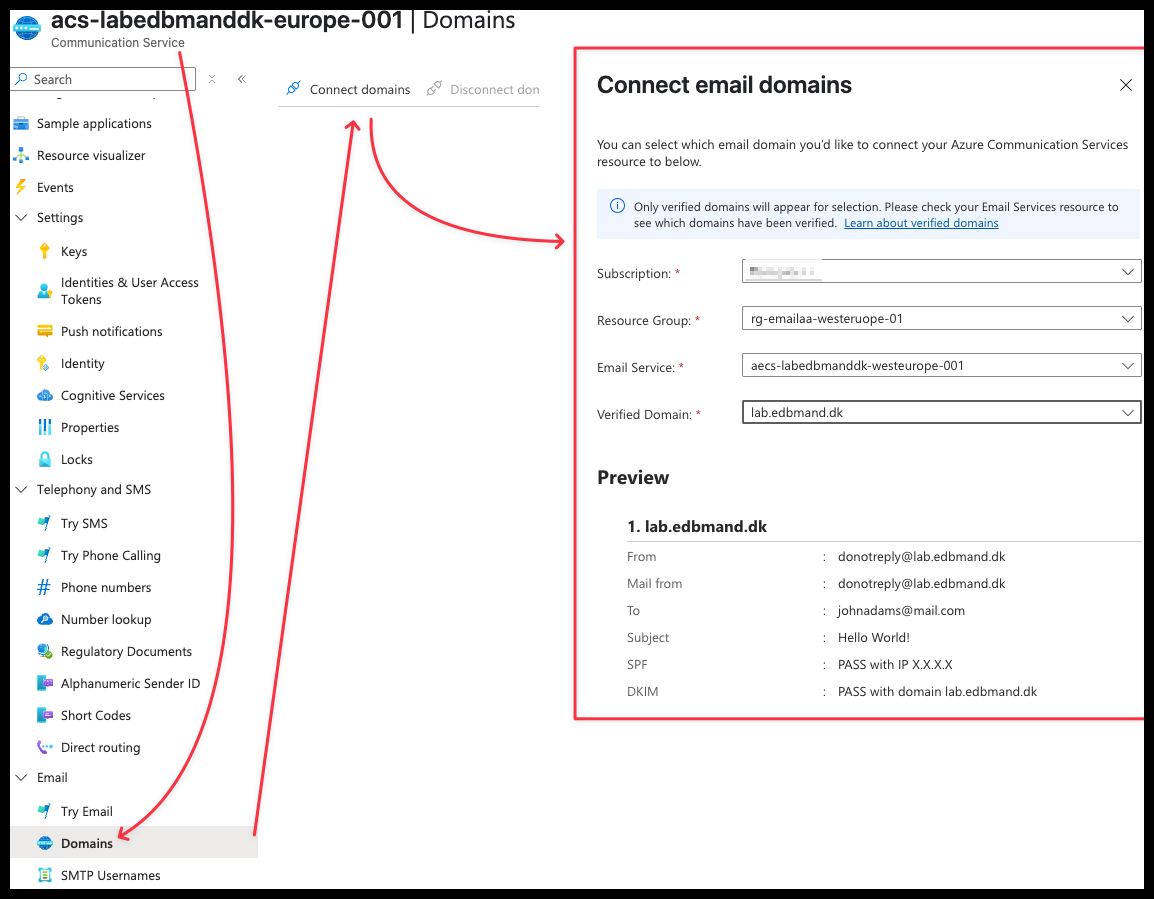
- In your Communication Service, Select Email -> Domains.
Click on Connect domains and select your custom domain
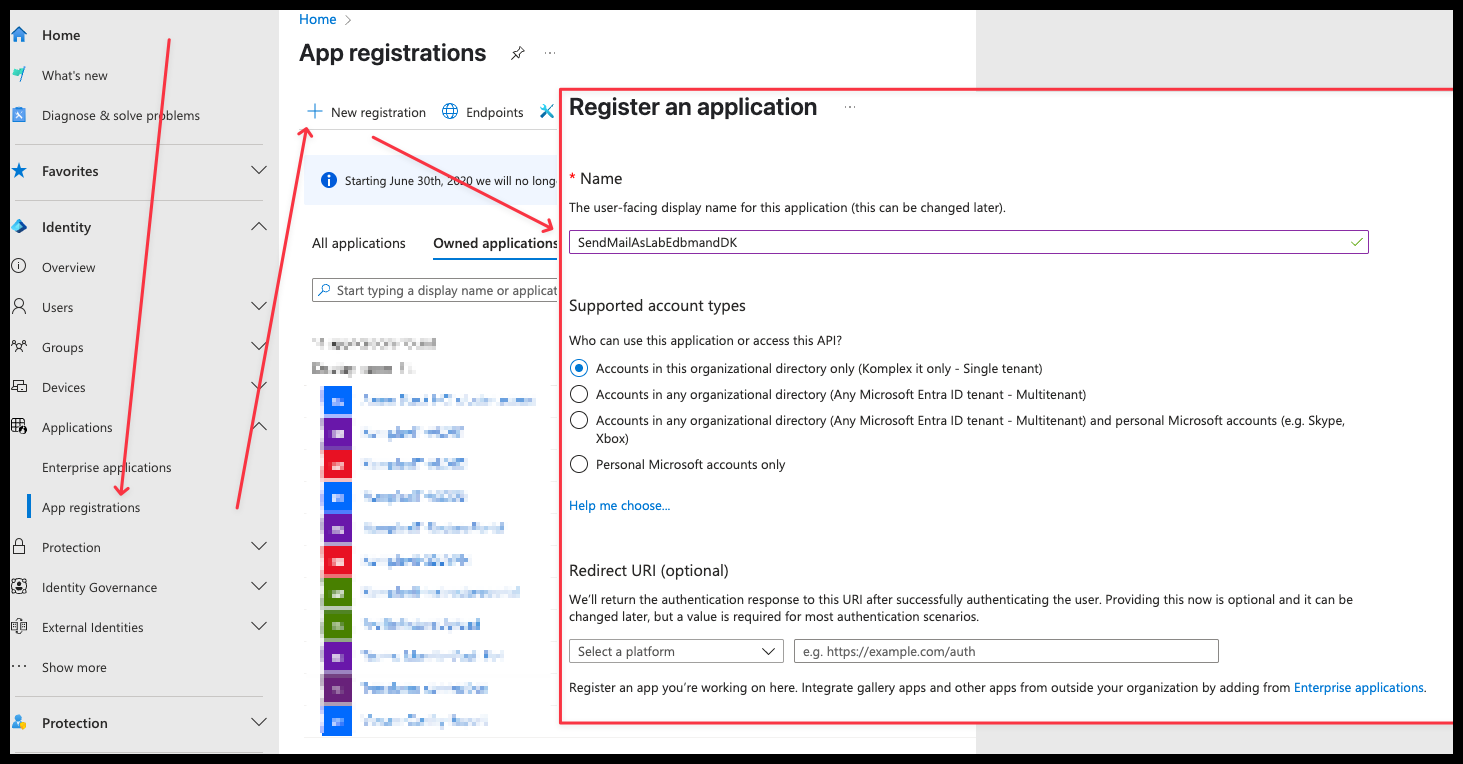
Step 4: Configure Entra ID Application
- Now, create an Entra ID application that will later be linked to an SMTP username.
- Go to entra.microsoft.com and click on Applications -> App registrations -> New Registration -> Give it a reasonable name
- I choose
SendMailAsLabEdbmandDK
- I choose
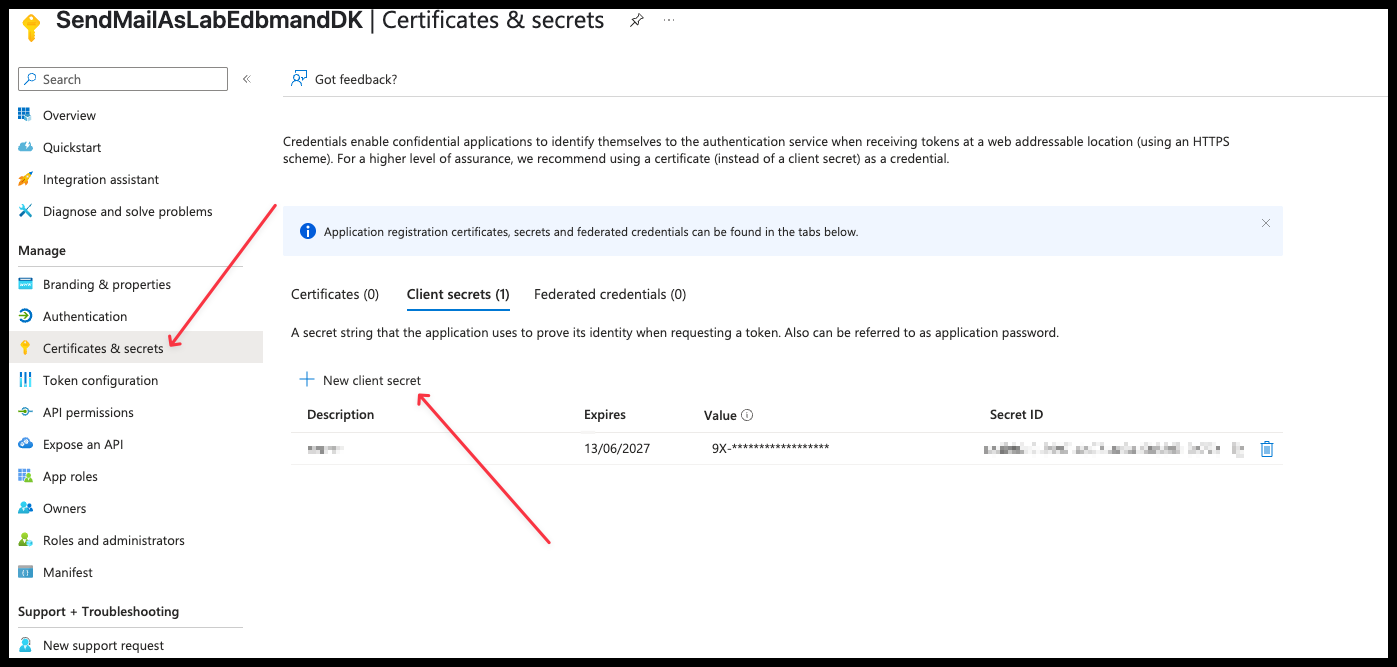
- Go to Application Registration -> Select your application -> Certificates & Secrets -> and create a Client Secret.
- These secrets act as passwords for the SMTP username. Make sure to copy and store them securely—you can generate additional secrets later if needed.
Step 5: Assign Permissions to ACS
- Return to your Communication Service. We now need to grant the Entra ID application permission to access the service.
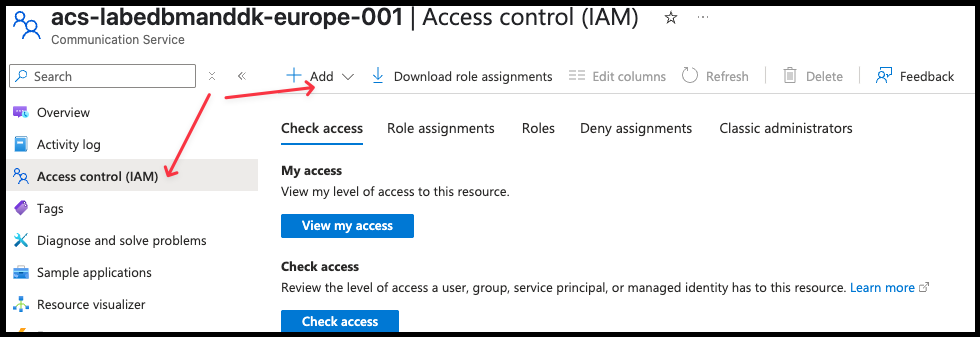
- Click on Access Control (IAM) -> Add -> Add role assignment
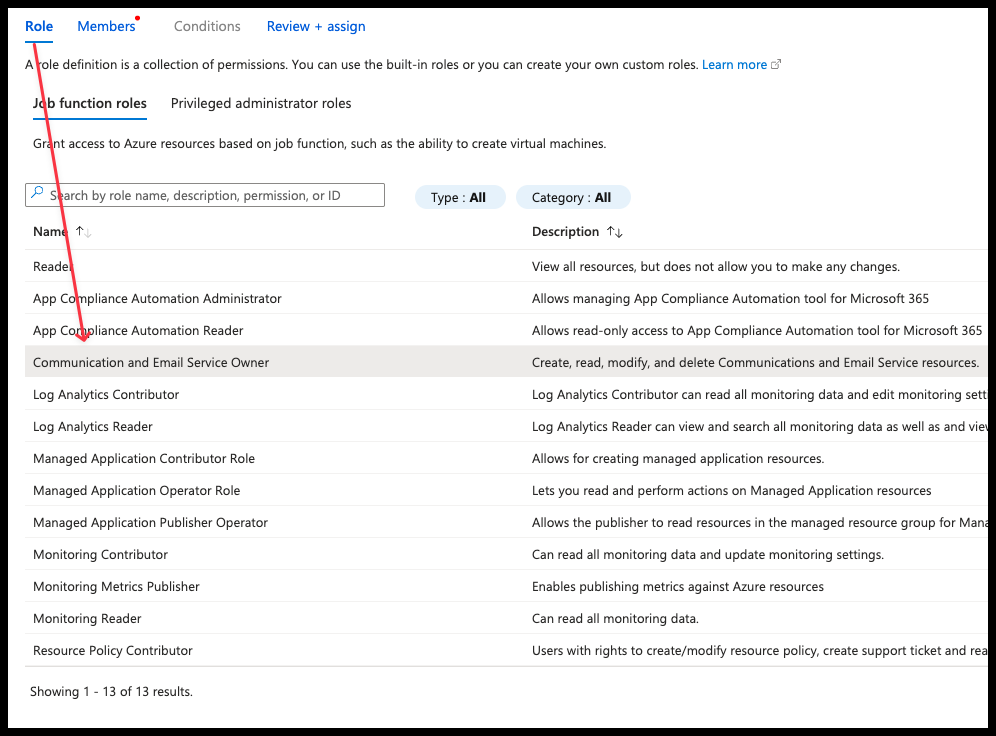
- Click on Communication and Email Service Owner and click Next
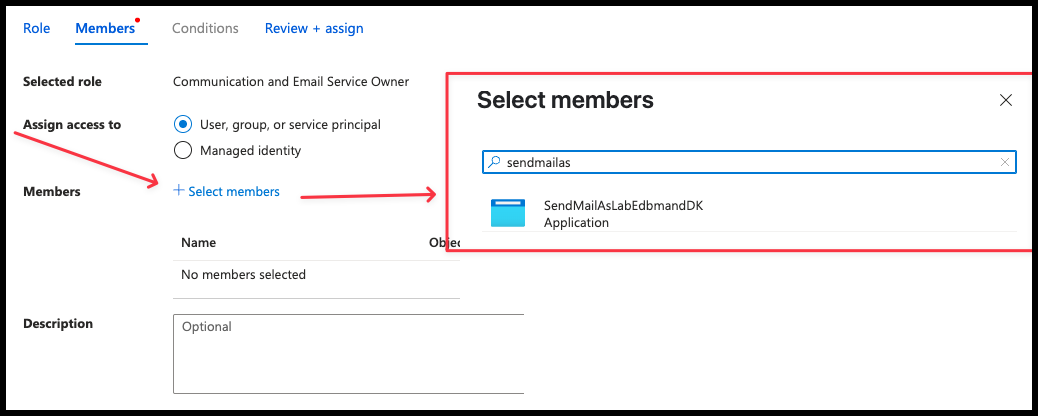
- Select the Entra ID Application as member, then click Review + Assign, followed by Assign
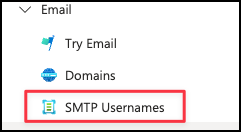
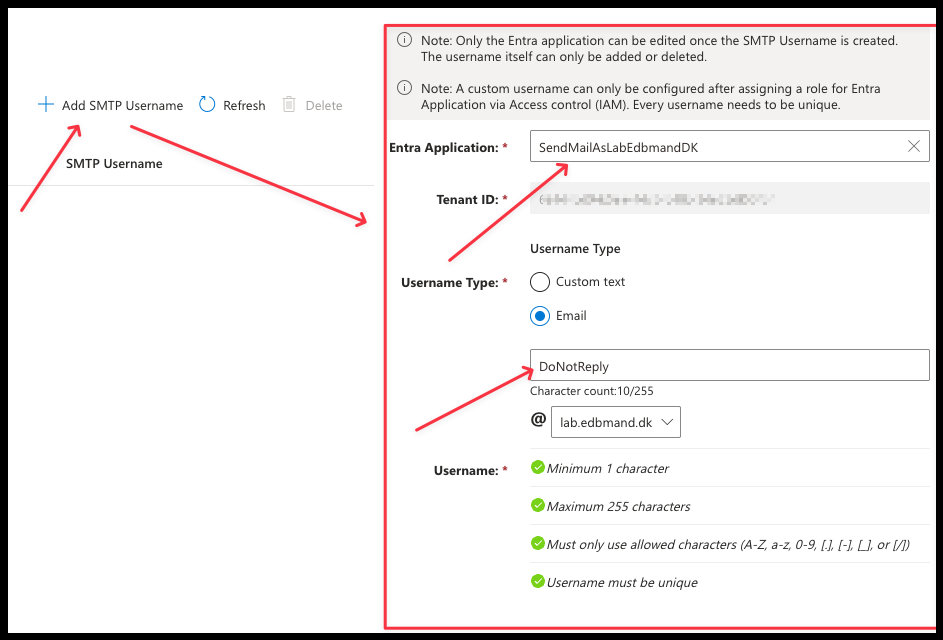
- In your Communication Service, click on Email -> SMTP Usernames
- Click on Add SMTP Username. Select your Entra ID Application and enter the email address that was created in the Email Communication Service earlier in step 15
- In this example "DoNotReply"
- The email address must be linked to the Email Communication Service in order for the application to use it.
Step 6: Test Your Email Setup
Now lets test this! By sending a test mail with powershell
First create a variable that contains our SMTP User credentials$creds = Get-Credential
Username: DoNotReply@DOMAIN.COM
Password: "Entra ID Application Client Secret"
Then send a test mail to your selfSend-MailMessage -from DoNotReply@DOMAIN.COM -To EMAIL@DOMAIN.com -Body "test" -Subject "IT WORKS! YES" -SmtpServer smtp.azurecomm.net -UseSsl -Port 587 -Credential $creds
Below is the SMTP information
|
Device or Application setting |
Value |
|
Server / smart host |
|
|
Port |
Port 587 (recommended) or port 25 |
|
TLS / StartTLS |
Enabled |
|
Username and password |
Enter the SMTP Username and one Microsoft Entra application's client secrets. |
Official guidelines: https://learn.microsoft.com/en-us/azure/communication-services/quickstarts/email/create-email-communication-resource?pivots=platform-azp