Deploy Azure Stack HCI sandbox
This little article will demonstrate how to deploy the Azure Stack HCI Sandbox. The Sandbox environment are created and configured as a 2-node cluster in Azure for test purpose.
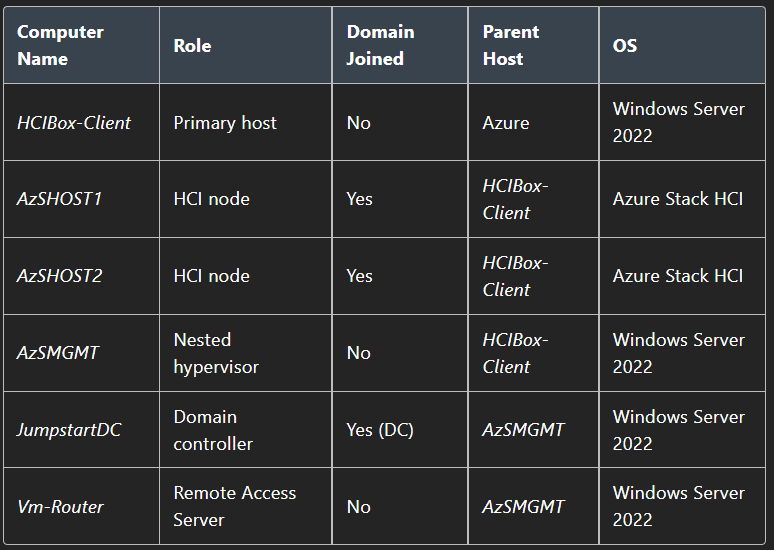
The sandbox is running on Azure Virtual Machine with nested hyper-v enabled, to host the below machines.
Prepare the environment
- Open Azure Portal or preferred tool to Connect Azure CLI, in this demonstration I use Azure CLI from Azure Portal.
- Clone the Azure Arc repository
git clone https://github.com/microsoft/azure_arc.git- Azure CLI version 2.56.0 or above is required so make sure your module is up-to date
az --version- Login to Azure from the CLI
az login- Make sure you have selected the desired subscription to deploy in. To list the default subscription selected, execute the following command.
az account list --query "[?isDefault]"- To select another subscription use the following command
az account set --subscription "SUBSCRIPTION_ID"- Ensure you have sufficient vCPU quota available in your Azure subscription and the region where you plan to deploy HCIBox. You can use the below command to check your vCPU utilization. I'm located in west Europe; you can adjust the location accordingly.
- Verify you have at least 32 "Standard ESv5 Family vCPUs" available, as mentioned before.
az vm list-usage --location westeurope --output table- Now we have to create a SP and assign it Owner role of the subscription. This is required for the deployment.
subscriptionId=$(az account show --query id --output tsv)

az ad sp create-for-rbac -n "StackHciOwner" --role "Owner" --scopes /subscriptions/$subscriptionId- The output should be something like this
{
"appId": "XXXXXX-XXXXX-XXXX-XXXX-XXXXXXXXXX",
 "displayName": "XXXXXX",
 "password": "XXXX~XXXX~XXXX~XXXXXXXXXXXXX",
 "tenant": "XXXXXX-XXXXX-XXXXXX-XXXXXX-XXXXXXX"
}Deploy the Sandbox
- We are using Azure Bicep to deploy the sandbox, so make sure to be on the latest Bicep release
az bicep upgrade- Now we have to grab the object id for your directory's Azure Stack HCI resource provider
az ad sp list --display-name "Microsoft.AzureStackHCI Resource Provider"- Navigate to the following directory from where you cloned the repository: /azure_arc/azure_jumpstart_hcibox/bicep
- Edit "main.parameters.json" file and modify the values to your environment:
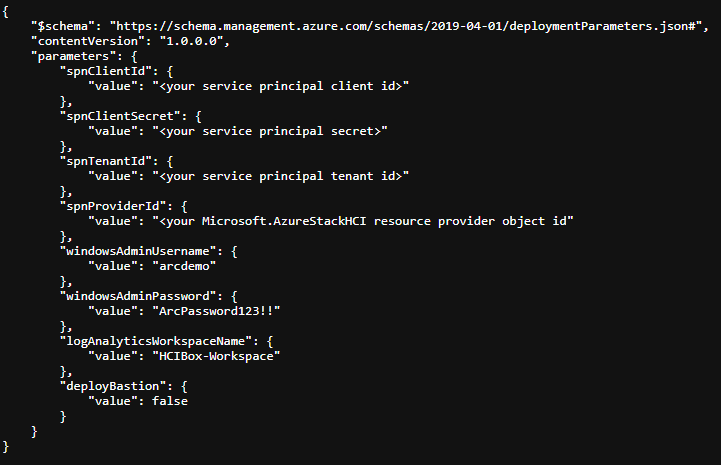
- spnClientId - Your Azure service principal id
- spnClientSecret - Your Azure service principal secret
- spnTenantId - Your Azure tenant id
- spnProviderId - Your Azure Stack HCI resource provider id, retrieved in an earlier step
- windowsAdminUsername - Client Windows VM Administrator username
- windowsAdminPassword - Client Windows VM Password. Password must have 3 of the following: 1 lower case character, 1 upper case character, 1 number, and 1 special character. The value must be between 12 and 123 characters long
- logAnalyticsWorkspaceName - Unique name for the HCIBox Log Analytics workspace
- deployBastion - Option to deploy Azure Bastion which used to connect to the HCIBox-Client VM instead of normal RDP. (I don't use it for the demo)
- Now we can create a resource group and deploy the Bicep file! Navigate to the cloned deployment folder "/azure_arc/azure_jumpstart_hcibox/bicep" (If you are not currently in it)
az group create --name "<resource-group-name>"  --location "location"

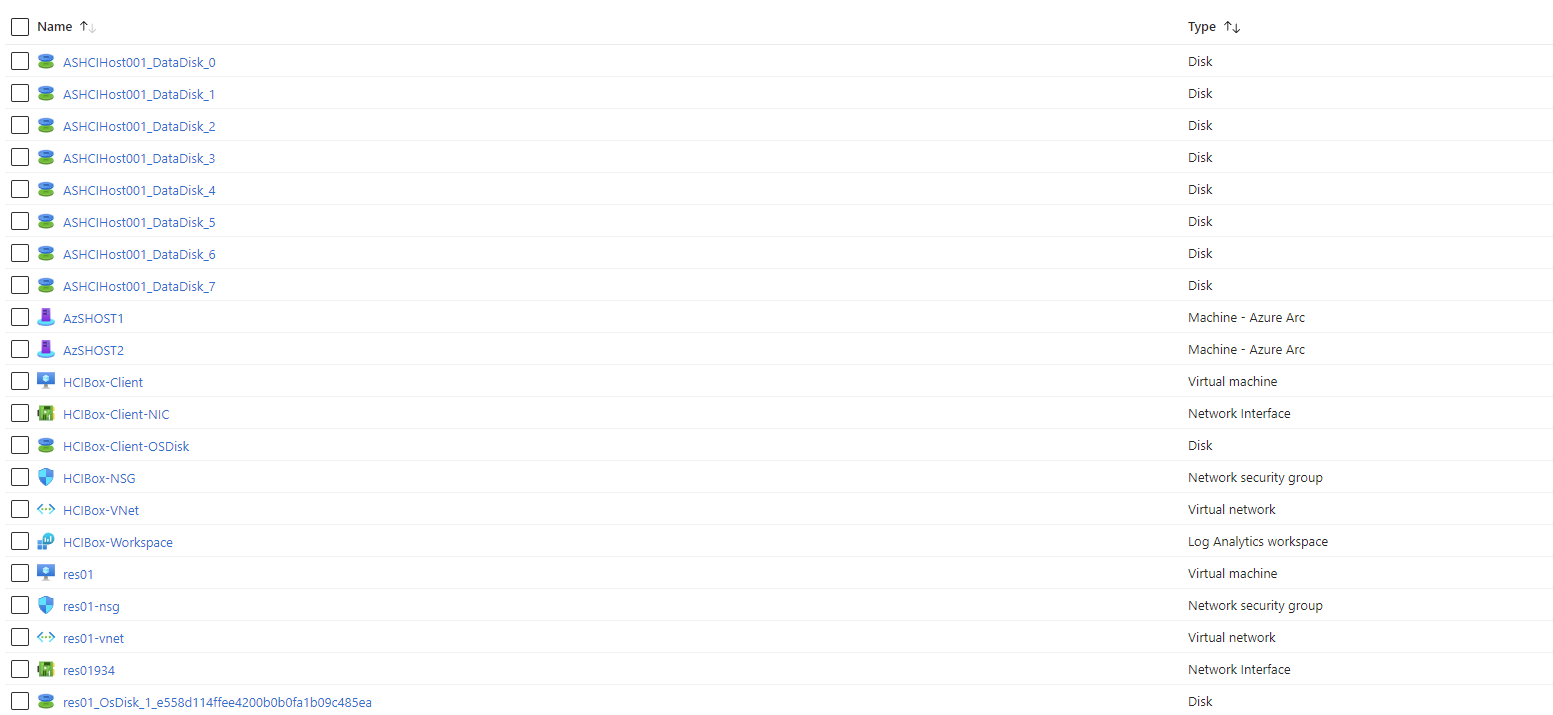
az deployment group create -g "<resource-group-name>" -f "main.bicep" -p "main.parameters.json"- After the deployment is complete you will see a lot of resources in the resource group.
Connect to the Sandbox
- By default RDP 3389 isn't allowed when using this deployment, so we have to go and create an Inbound rule to allow this.
- Open the NSG "HCIBox-NSG" and navigate to "Inbound security Rules" and click "Add"
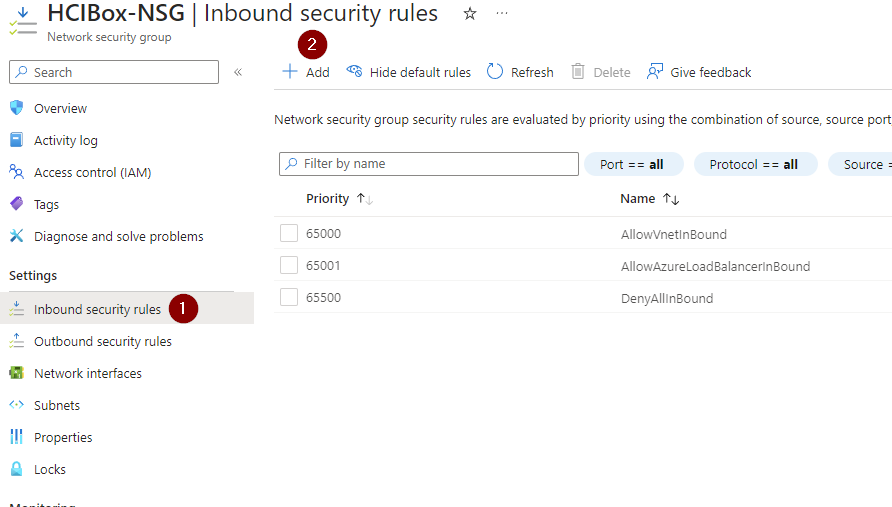
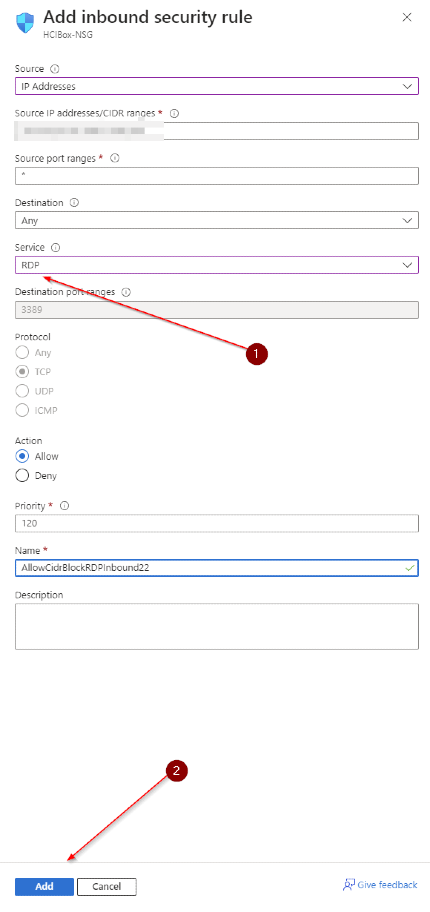
- If you want to lock down the RDP access to only your public IP address, change the Source dropdown to "IP Addresss" and type in your public ip address.
- In the "Service" dropdown select "RDP and click "Add"
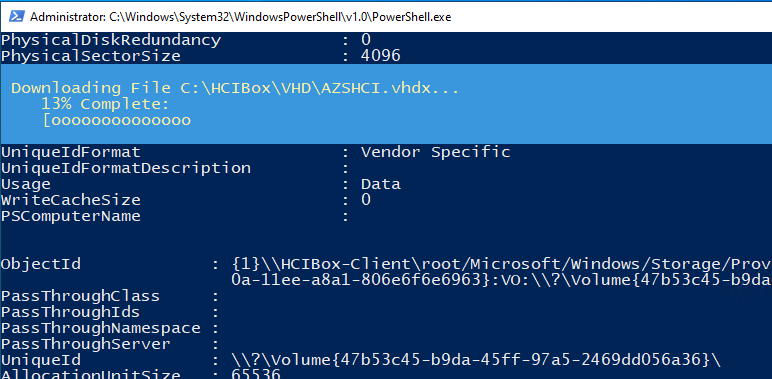
- Now navigate to the resource group and Connect to vm HCIBox-Client. When connected to the machine, a powershell prompt will be displayed.
- it will take about approx 1-2 hours to finish the setup; Once finished the infrastructure has been deployed successfully
Create Azure Stack HCI Cluster
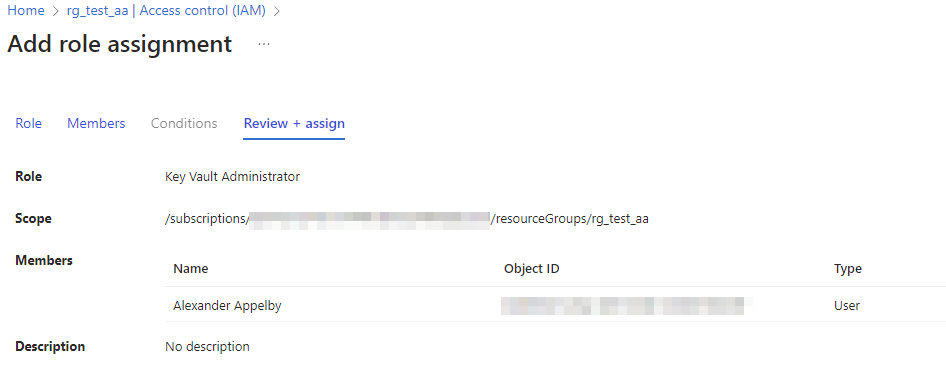
- Before submitting the ARM deployment, you need to add your user account as a Key Vault Administrator on the resource group. Navigate to the resource group then click "Access Control (IAM)" and then "Add role assignment". Select the "Key Vault Administrator role" then click on to the next screen to select your user account and assign your user the role.
- Connect to VM (HCIBox-Client) and navigate to the C: Drive; Right click on the Folder HCIBox and open in VSCode
- Open and review the "hci.json" and "hci.parameters.json" files in VSCode. Verify that the "hci.parameters.json" file looks correct without "-staging" placeholder parameter values.
- Navigate to Azure portal and search for "custom deployment" in the search bar, then select "Deploy a custom template".
- Click on "Build your own template in the editor".
- Paste the contents of "hci.json" into the editor and click "Save".
- Click "Edit parameters" and then paste the contents of hci.parameters.json into the editor and click "Save."
- Click "Review + Create" and Create when done validating
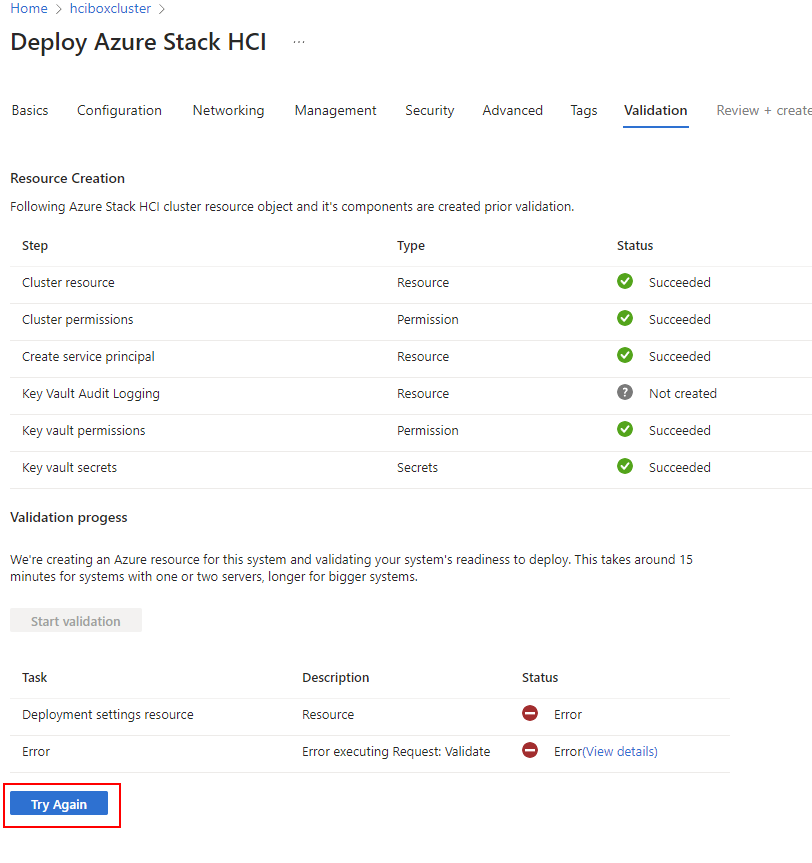
Since release of v2402, validation of resource "hciboxcluster/default" might fail...! this can be fixed by going to the Azure Stack HCI Cluster resource and click on "view more" in the error code as shown in the below picture.

- Click on "Try again" to fix the validation of Cluster resource
- Wait for the resources to be done and click "Review + Create".
Deploy cluster in azure portal
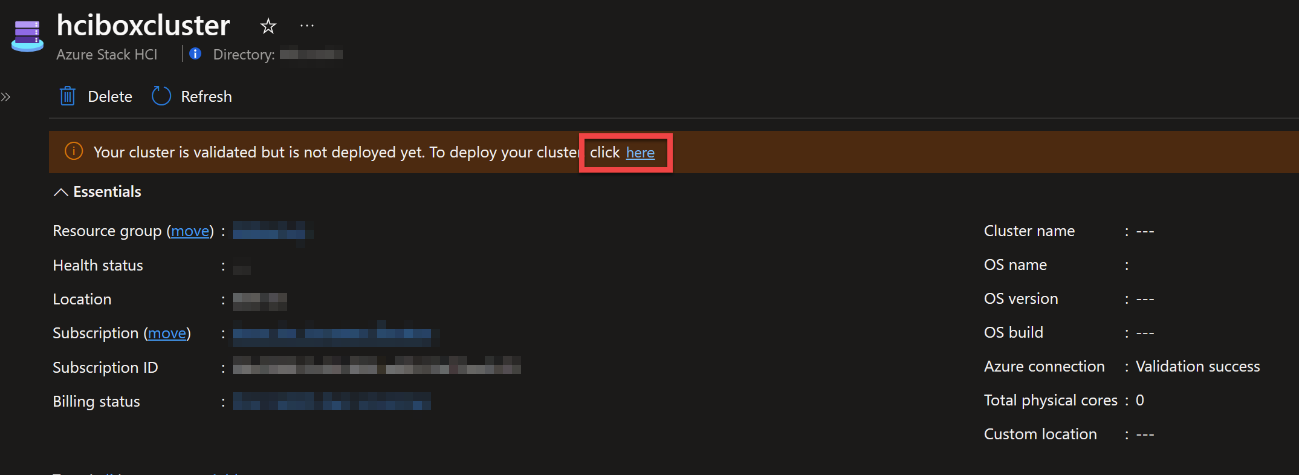
- Head over to the Azure Stack HCI resource (hciboxcluster) and click on the Deploy now link. Follow the steps and deploy the cluster, it can take some time to deploy
You have now deployed Azure Stack HCI evaluation on Azure!
Deploy AKS on Azure Stack HCI
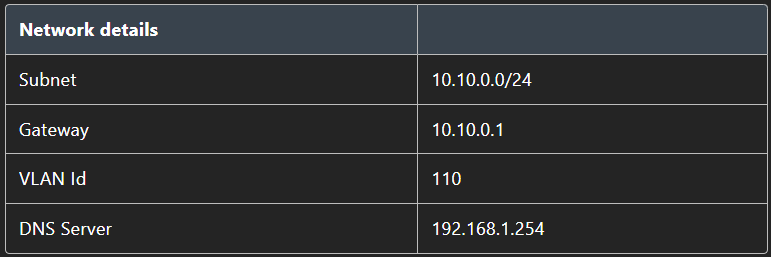
The Sandbox deployment comes with a script which creates a local virtual network object in Azure that is a requirement for AKS to run. Afterwards it deploys the AKS workloads.
Following table is preconfigured network dedicated to ASK deployment
- First create a new Entra group, it can be a Security- and Microsoft 365 group
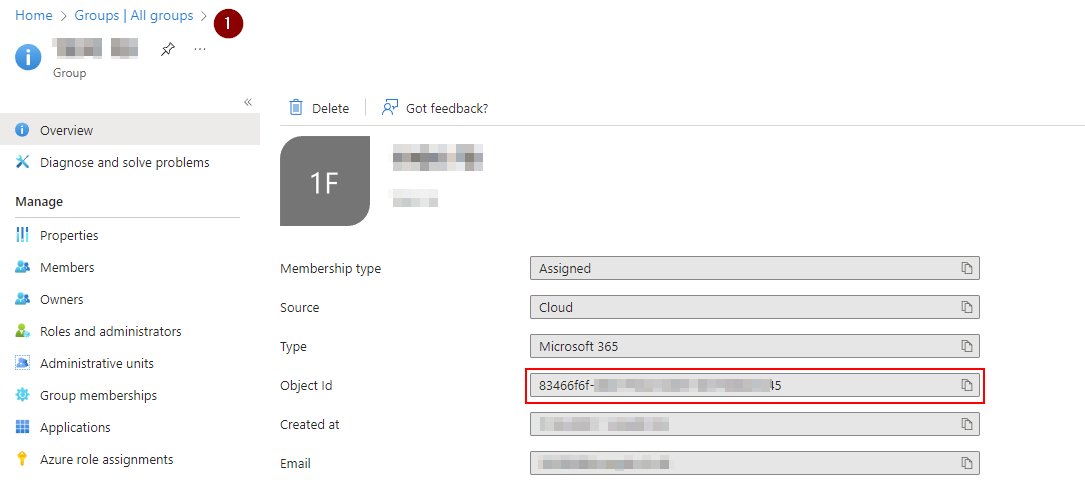
- Grab the object id of Group and save it for later
- Connect to HCIBox-Client and navigate to C:\HCIBox
- Edit "Configure-AksWorkloadCluster.ps1"
- On line 6; Uncomment $aadgroupID and paste your Group id

- Save the file and Run "Configure-AksWorkloadCluster.ps1" powershell script
- The script will automatically close when successfully deployed.
- Now go back to Azure portal and connect to your AKS cluster
az connectedk8s proxy -n hcibox-aks -g <name of your resource group>- If you get the below error; try login to Azure again

az login- Open a new Cloud Shell Session and type in the following command to see all the pods running on the AKS Cluster
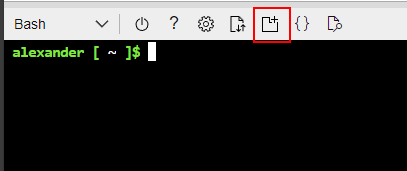
kubectl get pods -A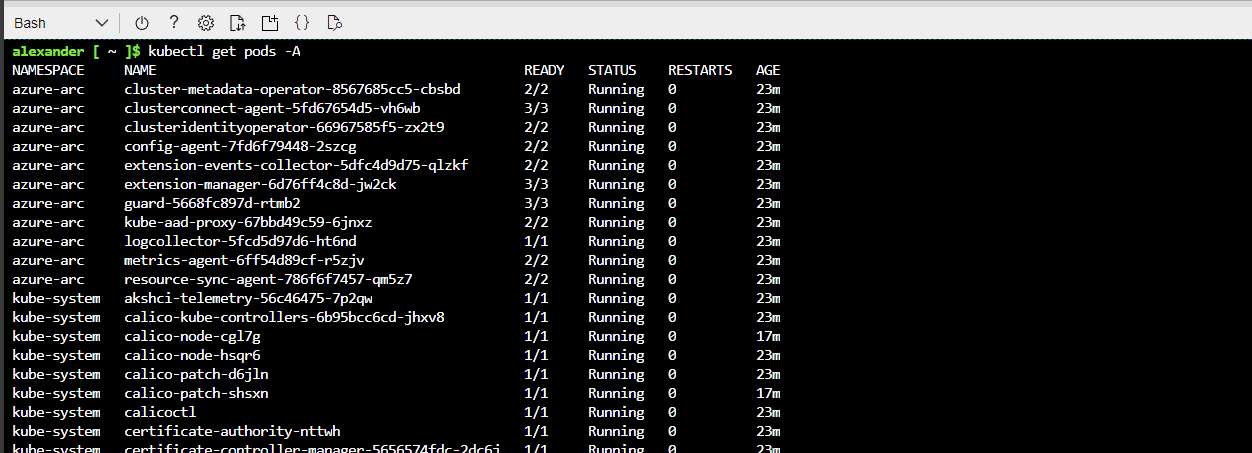
- There you have it! AKS cluster created on Azure Stack HCI.
Install Windows Admin Center
- Windows Admin center can be used to manage the Azure Stack HCI, on-prem and Cloud infrastructure. I personally use this tool to mange on-prem Clusters, create Azure Stack HCI clusters aswell as deploying services. You can of course just use Azure Portal if you want to!
- WAC installer can be found on VM HCIBox-Client's path "C:\HCIBox\Windows Admin Center" or downloaded from this link: Windows Admin Center | Microsoft
Sandbox environment
Active Directory Account
- administrator@jumpstart.local / "Password you chose in earlier step for the local administrator (default is ArcPassword123!!)
